A three act math discussion
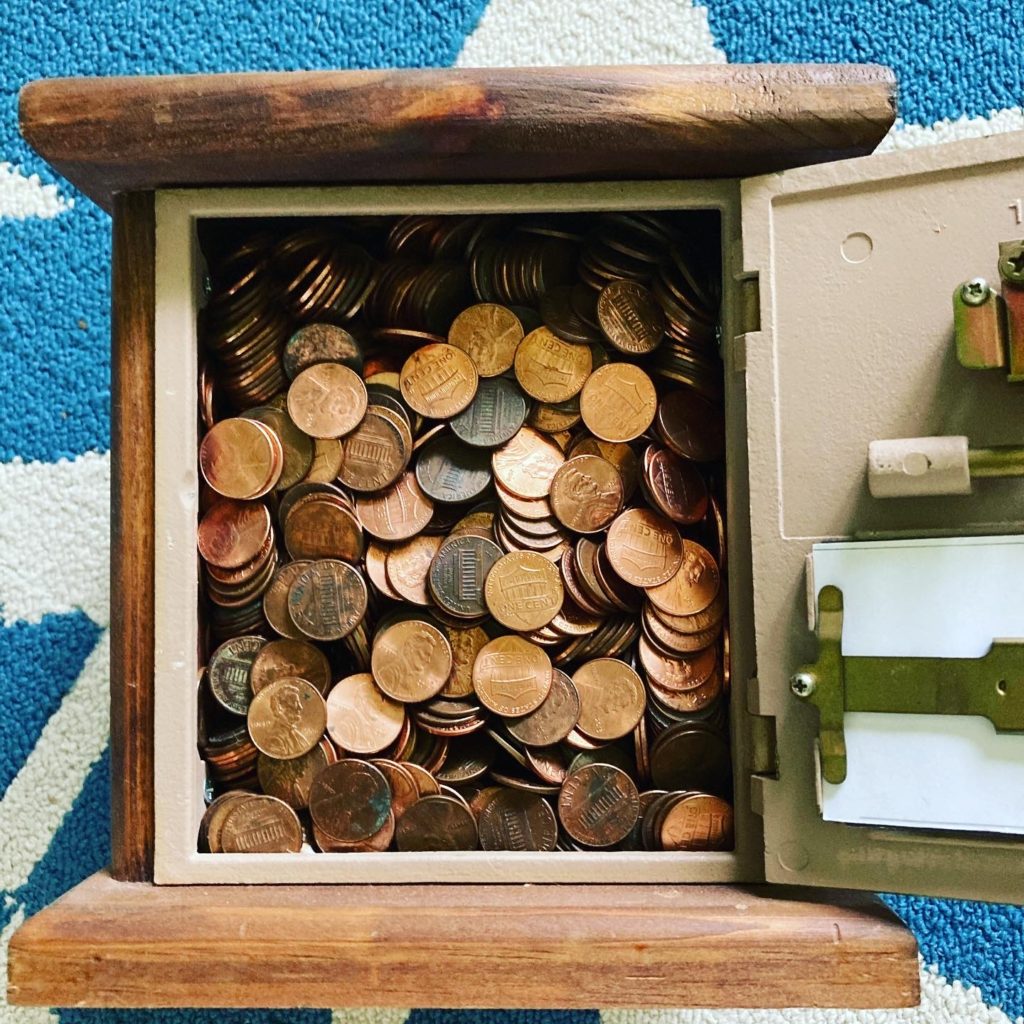
Many years ago, my husband’s best friend made this bank for him using and old post office box. They were both postal workers and this friend is no longer with us, so this bank is pretty special to us. We use it to save our pennies.
I shared about this on social media a few years ago because I thought the bank was so full that I would have to empty it soon. Surprisingly, here we are nearly three years later and I am still shoving pennies into the slot in the top. Sometimes I have to shake it a bit to get them to fall through, but it still takes them.
When I learned about three act math tasks, I immediately thought of this bank and how it just keeps accepting the pennies I put into it. I knew there was a valuable problem solving experience in there somewhere and I am finally getting around to developing and sharing the idea.
A three act what?
If you have never heard of a three act math task, it’s a way to structure a math lesson or discussion so students are intrigued and are motivated to discover the underlying math concept. A traditional math lesson goes something like this…
- Teacher reviews yesterday’s lesson briefly
- Teacher tells students what’s on tap for the day
- Teacher introduces the concept
- Teacher gives examples
- Teacher connects new learning to old learning
- Teacher asks students to help with a few more examples
- Students work even more examples on their own
What do you notice about this structure?
I taught this way for several years and all I can say is it feels as much like “Blah, blah, blah” to the teacher as it does to the students. All I can think of as I write that list is the teacher in the old Charlie Brown specials. You never hear what the adults are saying. You only hear “Wa wa wa wa wa wa.”
Math is supposed to be an exciting discovery of connections and honing problem solving skills and most of us never experienced it that way.
So, three act math tasks kind of turn that boring old lesson on it’s head and put the responsibility of learning back on the student, where it should be.
So, here’s an example of how I might use my penny bank to spark interest.
Act One
Show students this short video and ask two questions:
What do you notice?
What do you wonder?
Allowing a minute or two of think time gives all students a chance to come up with something to contribute. Now it’s time to make a list of all the things students notice and wonder about the video. This is true no matter how many students you are working with.
As the facilitator, you have a question or two in mind that connects to the concept you are introducing so you know the direction you want your learners to go with their thinking. Hopefully, at least one student was wondering the same thing. If not, you can add your idea to the list.
Settle on the question you want your mathematicians to answer and ask for some estimates.
What number is too low?
What number is too high?
What number is just right?
This part usually starts some good discussion among the masses. As students get more comfortable with the concepts and more confident in their mathematical thinking, you can push them a bit further. Even young students will offer that 0 is too low and a million is too high. Challenging them to shrink the range between the low and high helps them think more critically and helps you gauge confidence and understanding. I mean, if a student gives a just right estimate that is outside their low/high range, you know there’s work to do, right?
{Side note: estimation is a super important skill that does not get enough focus. It’s one of those things that’s best developed through consistent practice instead of a few direct instruction sessions…more on that in another post.}
I could spend a lot more time unpacking this part of the process, but let’s get back to the big picture for now.
The final part of this introduction is to ask students to tell you what information will be helpful to answer the question. In my opinion, this is the piece that separates those who have an understanding and are thinking critically from those who don’t. You want your learners here to evaluate the information they have, compare that to what is needed to solve the problem, and identify crucial details that are missing.
Act Two
Give them those details.

This part is pretty simple. You give them the information related to the concept that is necessary to solving the problem. For example, let’s say the question we are focusing on is how many pennies will it hold. In a middle school classroom, I might show a picture of the inside of the bank and tell them the dimensions of the space inside (which happens to be 5.75″ (width), 6″ (height), 5″ (depth). I might also give the dimensions of a penny or a stack of ten pennies, or let them research that for themselves. For first or second graders, I might show the inside of the bank and a picture of what a pile of ten pennies or a hundred pennies looks like.
Get the idea?
Then it’s time to give those mathematicians a minute or so of think time and ask them to either keep their original estimate or change it. This is an important step not only because it provides more practice in the skill of estimating, but because it teaches students to continuously evaluate their thinking when presented with new information. Here’s a good time to challenge them to shrink that too high/too low range I mentioned earlier.
Now give them the space to use the info you’ve given and let them work it out. I like to give students a few minutes of independent time to gather their thoughts and then toss them together in small groups. Peter Liljedahl has shown random groups of three work well to develop problem solving and critical thinking skills. You can check out his work here.
Record some solutions and have students share their thinking. It’s important that kids learn how to discuss their ideas and how to ask questions when they need clarification, so encourage other groups to find similarities and differences in thinking and to ask questions when they don’t understand someone’s explanation. This is also the place where it’s important to highlight connections to previously learned concepts. As the facilitator, you should have an idea of what those connections are so you can steer the conversation if it students don’t get there themselves.
Act Three
You can probably guess the final act.
Reveal the answer.
I haven’t cashed in my coins just yet, so I’ll have to update this when I do, but you get the idea.
And don’t stop there. So often we stop after giving an answer to a problem. Sometimes we ask who got it correct. We may even ask students how close they got or to find their mistake. Evaluating and reflecting on the process is an important step that we often overlook. I also like extending the problem in other directions by having students ask more questions that were sparked by the outcome or by revisiting some of the original wonders to see which ones have already been answered (you can do this during Act Two, as well) and which ones need more information.
So, I’m interested to know if you’ve tried this kind of lesson in your classroom. If so, how did it go? If not, what do you think?
How would you modify this lesson for your own class or grade level?
For more 3-act task ideas, check out Graham Fletcher’s site here.


